This step-by-step guide on organizing tent accessories for camping trips offers practical tips to streamline your camping experience. It emphasizes the importance of keeping your gear organized to reduce frustration and enhance efficiency while setting up camp. The guide includes strategies such as categorizing items, utilizing storage solutions, and packing techniques to ensure that everything is easily accessible when you need it. By following these steps, campers can ensure a smooth, enjoyable adventure, free from the hassle of disarray.


12 Tips to Enhance Your Camping Experience – Tent Hacks
Gather All Accessories
Gather all your tent accessories in one designated area. This step is crucial for efficient organization. Collect the following items:
- Tent stakes
- Guylines
- Rainfly
- Footprint
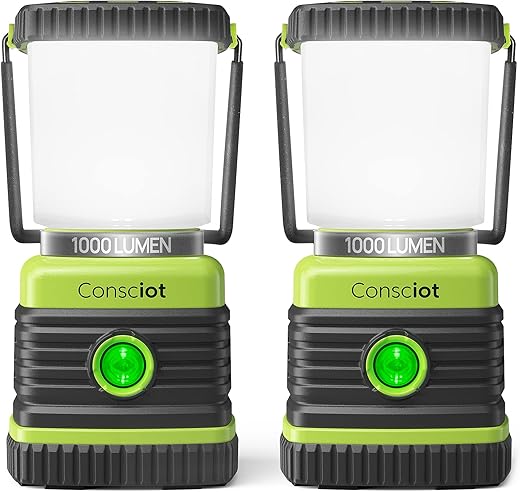
- Lanterns
- Sleeping pads
- Any other camping essentials that pertain to your tent
Once you have everything in one spot, take a moment to evaluate your inventory. Visualize what you currently possess and identify duplicates or items that need replacement. This comprehensive overview will unveil any gaps in your camping gear that need addressing, sparing you unnecessary stress during future trips. From here, you can proceed to sort and organize these items effectively.
Clean and Inspect Accessories
Gather all camping accessories and lay them out in a clean, open space. Clean each item thoroughly using mild soap and water, removing dirt and debris. Inspect stakes for any bends or warping; if damaged, replace them immediately. Check guylines for signs of fraying or wear; if they are not secure, replace them with new lines. Take a close look at the tent fabric for any holes, tears, or signs of degradation. Repair minor damage with patch kits or fabric glue, or replace the fabric entirely if the damage is extensive.
After ensuring all items are in good condition, organize them neatly for easy access during your next outing. Store stakes in a pouch, coil guylines, and fold the tent fabric properly. Label each accessory if necessary to streamline the setup process in future trips.
Sort Accessories by Category
Organize your accessories into clear categories for efficiency. Begin by gathering all your gear and laying it out in a designated workspace. Separate items into distinct groups, starting with shelter components. Identify and place tents, rainflies, and footprints together to streamline access during setup.
Next, focus on securing items; collect stakes and guylines, grouping them in an easily accessible container. Finally, assemble comfort items—include sleeping gear such as sleeping bags and pads, along with lanterns and other lighting solutions. Label each category clearly for quick identification, ensuring a smooth setup experience when you’re ready to hit the outdoors.
Choose Storage Solutions
Evaluate your accessory collection and determine the volume and type of items you need to store. Categorize your accessories according to their size and use, such as everyday items, seasonal pieces, and special occasion accessories. Identify suitable storage solutions like zippered bags for smaller items or clear containers with lids for larger ones. Select clear containers to allow easy visibility of contents, making it simpler to find what you need quickly. If you prefer portability, consider a dedicated backpack with compartments for organized transport of your accessories.
Choose storage options that are durable and, if necessary, waterproof. Look for materials that can withstand wear and tear, keeping your accessories protected over time. If you live in an area where moisture is a concern, opt for waterproof bags or containers to safeguard your items against the elements. Ensure that the compartments and closures of your chosen storage mechanisms are reliable, allowing secure closure and preventing accidental spills or losses.
Label Each Storage Container
Label each container clearly to identify its contents. Use large, bold fonts that are easy to read from a distance. Write a straightforward description of the contents, such as “Camping Gear” or “Snorkeling Equipment,” and include any pertinent details that may assist in locating specific items quickly. Ensure that the information is concise and relevant to avoid confusion when you revisit the container.
Use waterproof labels or markers to guarantee that the information remains intact in various outdoor conditions. Opt for durable labels that withstand moisture, sun, and wear, ensuring they are long-lasting. If using a marker, make sure it is water-resistant, so smudging or fading does not occur. This approach will save valuable time when packing and unpacking for your trips, keeping your adventures organized and efficient.
Create a Packing Checklist
Create a comprehensive packing checklist by first categorizing all essential items for your camping trip. Begin by listing specific groups such as shelter, cooking gear, clothing, and personal items. For each group, detail accessories that are necessary for a successful outing. This method ensures that you have a well-organized and thorough overview of your gear.
- Shelter items:
- Tent
- Tent stakes
- Ground tarp
- Sleeping bag
- Sleeping pad
- Cooking gear:
- Portable stove
- Fuel for the stove
- Cooking utensils (spatula, tongs, etc.)
- Biodegradable soap
- Cooler with ice packs
- Clothing essentials:
- Weather-appropriate outerwear
- Moisture-wicking base layers
- Hiking boots
- Extra socks and underwear
- Swimwear (if applicable)
- Personal items:
- First aid kit
- Sunscreen and lip balm
- Insect repellent
- Toiletries (toothbrush, toothpaste, etc.)
- Quick-dry microfiber towel
Follow this structured approach by systematically checking each item off your list as you pack. Regularly review your checklist before departure, adjusting it based on the specific location and duration of your camping trip. This serves as a reliable reference, maximizing your camping experience while ensuring you remember everything you need.
Practice Setting Up
Practice setting up your tent in your backyard or a local park before your camping trip. Lay out all your organized accessories, such as stakes, guylines, and rainfly, beside the tent. Familiarize yourself with the setup process by following the instructions step by step. This simulation will help you understand how each part fits together, which will save time and effort during your actual camping experience.
Observe any challenges that arise during practice. For instance, if you struggle to locate your guylines among your accessories, consider organizing them by using labeled bags or color-coded ties. Adjust your organization system based on this trial run. Try to set up the tent multiple times, noting any items that are difficult to find or cumbersome to use. By making these adjustments ahead of time, you ensure a smoother setup once you reach your camping destination.
Streamline Your Camping Experience
In conclusion, effectively organizing your tent accessories is key to a successful camping trip. By implementing these strategies, you’ll ensure that everything you need is easily accessible, making setup smoother and more enjoyable. Being well-prepared not only enhances your time spent in nature but also minimizes potential frustrations. With a well-organized approach, you can focus on what truly matters: enjoying the great outdoors with friends and family.
Essential Gear Checklist

Maximize Your Space
Essential Tips for Maximizing Your Tent Setup and Comfort
- Choose the Right Accessories: Select accessories that suit your tent type and camping needs. Common accessories include grounding stakes, guylines, tent lights, and footprints
- Set Up Ground Stakes Properly: Use durable stakes to secure your tent. Hammer them at a 45-degree angle away from the tent base to ensure stability, especially in windy conditions
- Utilize Guy Lines: If your tent has guy lines, attach them to the designated points and stake them out to provide additional support against wind and rain
- Incorporate Tent Footprint: Use a tent footprint to protect the base of your tent from sharp objects and moisture, prolonging the lifespan of your tent. Make sure it fits the dimensions of your tent
- Add Lighting Options: Consider using LED lights or string lights for visibility inside the tent. Hang them from the tent’s interior or set them on a stable surface to create a cozy atmosphere
Essential Gear for Your Tent Setup
A tent vestibule is an additional covered area that extends from the entrance of a tent. It is typically a smaller, sheltered space that helps separate the living area of the tent from the outside environment, providing extra protection against the elements.
The vestibule can be useful for campers in several ways:
- Storage Space: It provides a convenient area to store gear, shoes, and equipment, keeping the living space inside the tent clutter-free and more comfortable.
- Weather Protection: The vestibule acts as a barrier against rain, snow, and wind, allowing campers to take off wet clothing or gear before entering the main living area, which helps keep the inside dry.
- Convenient Entry and Exit: It creates a buffer zone, making it easier to enter and exit the tent without letting in too much cold air or insects.
- Cooking Area: In some cases, a vestibule can serve as a protected space for cooking, giving campers an outdoor area that is sheltered from direct weather when they need to prepare meals.
Overall, a tent vestibule enhances the functionality and comfort of camping by offering additional space and protection.




I had a disaster once where I forgot to pack my tent footprint. It was a muddy trip! Now I make a checklist based on the guide’s steps. Such a lifesaver! What’s the craziest thing you’ve forgotten on a trip?
I’ve learned the hard way to clean my tent pegs after each trip. They can get super rusty if you don’t! A simple vinegar soak does wonders. Anyone else have tips for cleaning tent accessories?
I have a variation! Instead of plastic bins, I use old backpacks. They’re durable and keep everything packed tight. Anyone else do this?
That’s a clever idea! Old backpacks can be super handy and they keep everything together. Plus, it’s a great way to repurpose gear!
I love the idea of labeling containers! I recently started using a label maker and it’s been a game changer. It makes finding stuff in the dark so much easier. Anyone else use a label maker?
Label makers are awesome! They really help keep things organized, especially on late-night camping trips. You might also consider color-coding for quick identification!
I find that packing my tent accessories by the weather forecast can really help. If rain’s expected, I’ll double-check my tarp and waterproof gear. Anyone else adjust their packing based on the forecast?
Absolutely! Packing based on weather conditions is smart. It saves you from scrambling at the campsite. Always good to stay prepared!
I’m curious about the practice setup. Do you guys recommend practicing in the backyard or somewhere else? I’ve always just winged it at the campsite!
Practicing in the backyard is perfect! It helps you get familiar with your gear without the pressure of a camping trip. Plus, you’ll spot issues before you head out!
I usually just throw everything into one bag, but this guide really makes me rethink that! It’d be cool to hear if anyone has a favorite storage solution that keeps everything organized and accessible.
Thanks for your comment! We recommend using clear storage bins or even mesh bags for easy access. Some people love using tackle boxes for smaller items like stakes and cords!
Great guide! I always forget half my accessories when packing. Quick question: when sorting, how do you handle multi-use items like a headlamp that can be used for cooking and setting up the tent?